
3 Simplest DIY Bathroom Upgrades You'll Ever See

3 Simplest DIY Faux Bathroom Upgrades You’ll Ever See
Is your bathroom looking a bit drab? Is it time to spruce things up? You don’t have to do an entire remodel to give your room a new sparkle. Here are three of the easiest do-it-yourself faux bathroom upgrade ideas you’ll ever see. Try them for yourself and see how simple it is to create a beautiful space with imitation luxe decor.
1. Beautiful DIY Faux Tin Tile Cabinets
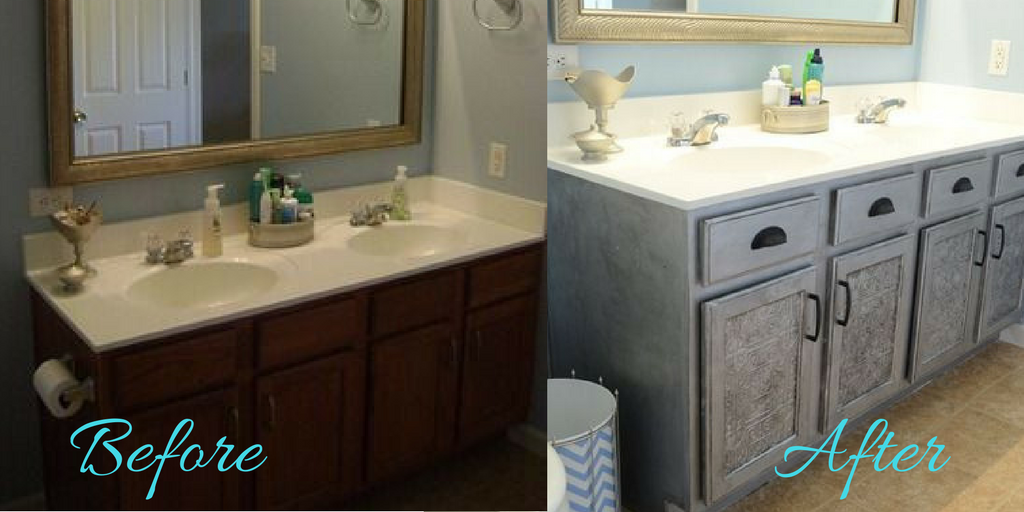
[Images sourced from Infarrantly Creative.]
Rather than install new cupboards in your bathroom, you can make the job so much easier by just adding faux tin tile to the surface. Add some paint and new knobs and you’ve basically got a new bathroom design. Though the above example uses an antiqued silver coloring job, there are no limits to how creative you can get with this upgrade idea.
This particular faux metal tile job was done with a simple, 7-step process:
- Remove cupboard doors/ drawers (screwdriver).
- Remove all hardware from doors/ drawers.
- Sand (sandpaper), clean, prime (spray primer), and tape-off (masking tape) all surfaces to be painted.
- Coat with metallic silver spray paint and allow to dry.
- Coat with black stain and wipe (stain rag).
- Replace hardware.
- Reinstall cupboard doors and replace drawers.
Of course, you can alter the steps and choose any hardware and colors that suit your fancy.
2. Chic DIY Faux Marble Countertop
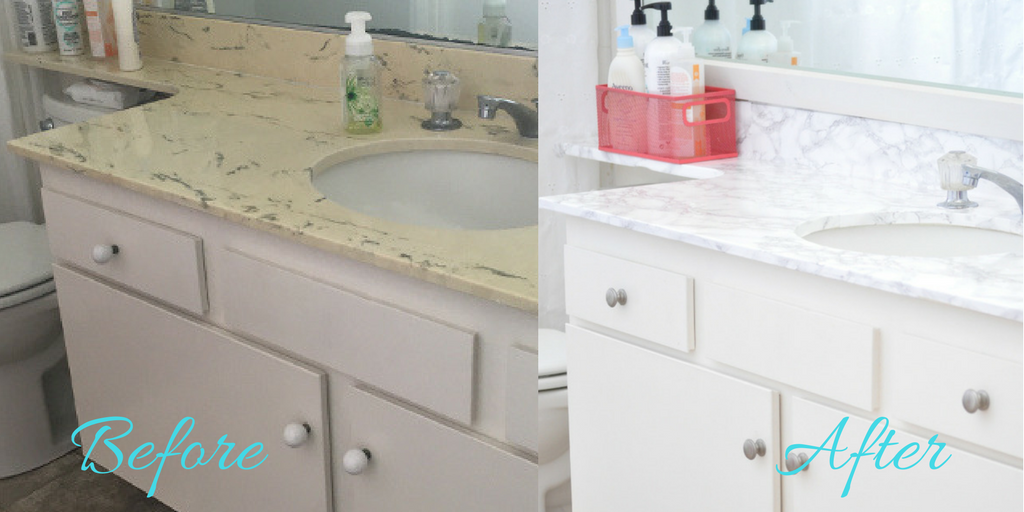
[Images sourced from Anika’s DIY Life.]
This faux marble job was actually done in a rental, if you can believe it. This means that when the occupant goes, so can the alteration to the bathroom countertops (Yes, seriously). The reason that’s okay is because, despite how beautiful it looks, the counter finish is insanely easy to do.
It can be done in six steps:
- Clean countertop and wipe with rubbing alcohol.
- Measure (measuring tape) and cut-out (scissors) the size marble contact paper you need.
- Slowly peel the backing from the contact paper and use a credit card to smooth out bubbles as you adhere it to the countertop.
- Overlap contact paper slightly on any edges that were missed.
- Use an exacto-knife to cut out sink and fixtures.
- Seal edges with transparent caulking.
Voila! I bet you didn’t expect it to be that effortless.
3. Elegant DIY Faux Leaded Glass Windows
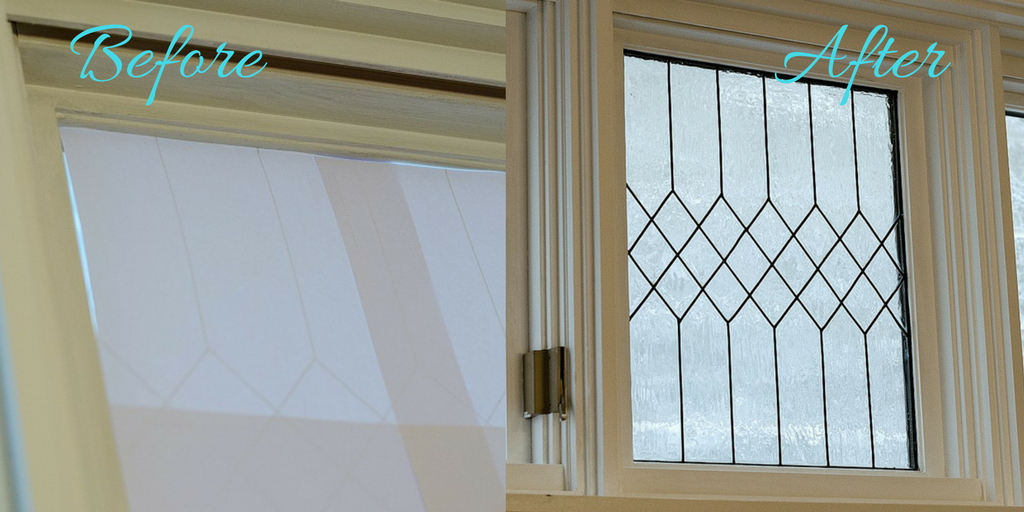
[Images sourced from Remodelaholic]
Have you ever wished you had leaded windows in your bathroom? The truth is there’s no need to replace them when you can follow this straightforward faux leaded window plan.
- Cut (scissors) a piece of paper to the exact dimensions (ruler) of the window you intend to decorate.
- Draw (pencil) your design on the paper.
- Tape the paper to the outside of the window.
- Apply leading strips where you want your design to be.
- Add liquid leading to the areas where the leading strips didn’t connect perfectly and allow it to dry for up to 10 hours.
- Apply a coat of crystal clear glass color to the entire window.
Once you see how trouble-free this process is, you’ll want to do it to all of the accent windows in your home.
Final Thoughts
Use the ideas above to add some personality to your bathroom. While you’re at it, check out our printed switch plate covers to compliment your new style.
EXPLORE POPULAR ARTICLES
-

From Boring to Beautiful: 5 Easy Ways to Upgrade Your Home Decor
2nd Mar 2025Home decor doesn’t have to be complicated or expensive to make a statement. Sometimes, the smallest
-

Serene Retreats: Designing Peaceful Spaces for Ultimate Relaxation
30th Sep 2024In today's fast-paced world, finding a quiet spot to unwind and relax is more important than ever. C
-

Ageless Beauty: Home Decor That Grows with You
2nd Jun 2024Home decor is a reflection of our personalities, tastes, and the various phases of our lives. Just a